
The Enquiry Forms module is now live and available under the Premium Plan in the Quotes Guru app.
This new feature allows merchants to create fully customizable forms for their storefront — perfect for product inquiries, service requests, or general contact forms.
💡 Plan Availability #
- Free & Basic Plans: Enquiry Forms are not available.
- Pro Plan: You can create 1 form.
- Premium Plan: You can create unlimited forms.
How to Create an Enquiry Form #
- Go to the Dashboard in your Quotes Guru admin.
- Click Enquiry Forms from the left navigation panel.
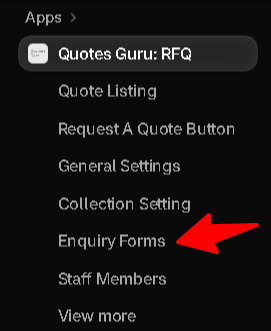
- A new page will open; click on “Create Form.”
- Give your form a name and start adding fields just like in the quote form.
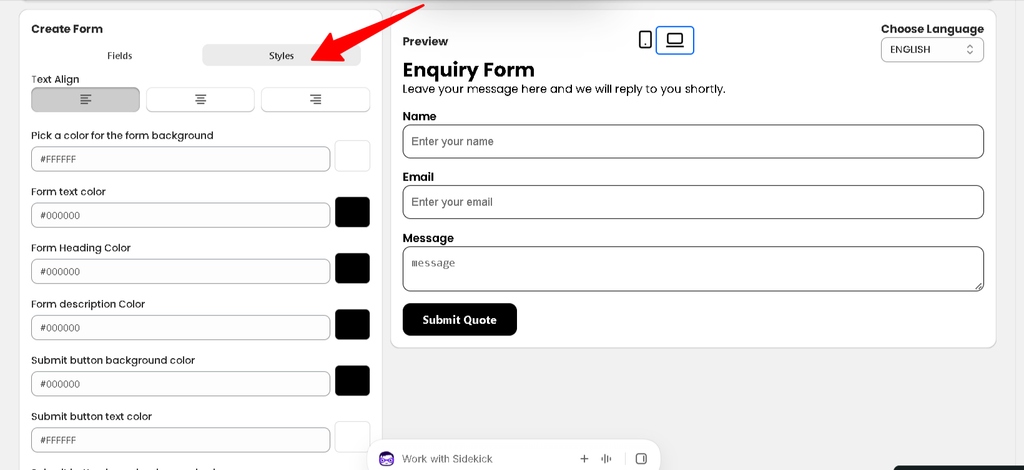
- Customize your form to match your website’s style and needs.
- Once done, click Save Form.
You can create Enquiry Forms or any other custom form that you want to display anywhere on your website.
Multi-Language Support #
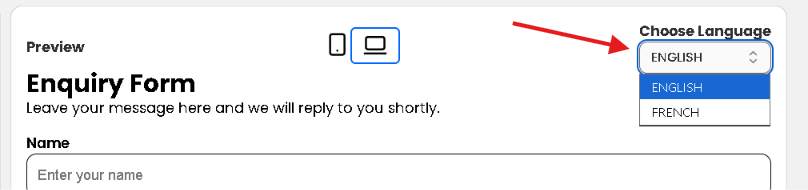
Just like the quote form, inquiry forms also support multi-language stores.
You can create and edit your forms in different languages so customers see the right version based on their store language.
Adding the Form to Your Storefront #
You have two simple ways to add your form to your Shopify store:
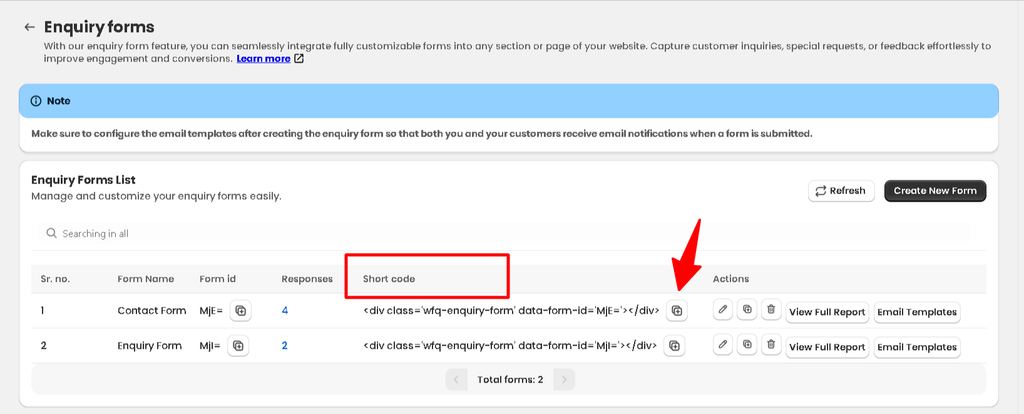
- Add the Form Using Shortcode or Liquid Code:
Add the shortcode snippet with your Form ID directly in your theme Liquid file.
2. Using Theme Editor (Drag & Drop):
From your Shopify Theme Customizer, drag and drop the Enquiry Form block into the desired section and enter the Form ID.

Customize Your Enquiry Form #
You can customize your form to collect the information your business needs.
When configuring a form, review the available field and form settings in your Quotes Guru admin. Add the relevant fields, adjust their labels, and configure the form according to your requirements.
How to show the open enquiry form on the page: #
You can display an open enquiry form on a Shopify page so customers can submit their questions or requests directly from your storefront.

Configure Email Templates for Each Form #
Quotes Guru allows you to configure email templates for individual enquiry forms. This helps you send appropriate notifications to your team and confirmation messages to customers.
- Send a confirmation email to customers after they submit the form.
- Receive notifications for each form submission.
- Assign different staff emails depending on the form type.
To configure the templates:
- Open Quotes Guru → Enquiry Forms.
- Locate the form you want to configure.
- Open its Email templates settings.
- Configure the Admin Template for your team.
- Configure the User Template for customer confirmation emails.
- Review the email preview and save your changes.
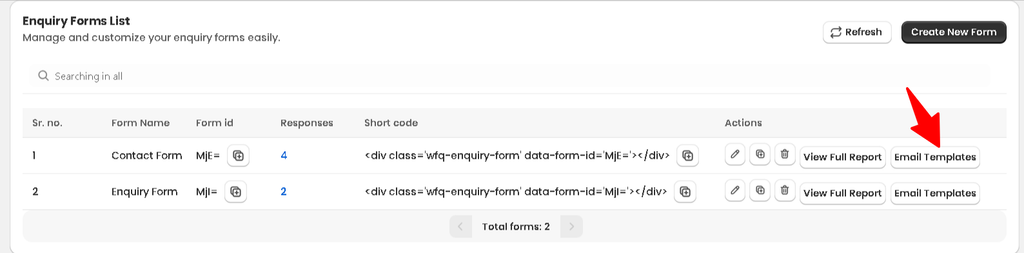
Repeat this process for every form that needs its own email configuration.
For detailed instructions, see How to Set Up Email Templates for Enquiry Forms in Quotes Guru.
View and Manage Enquiry Submissions #
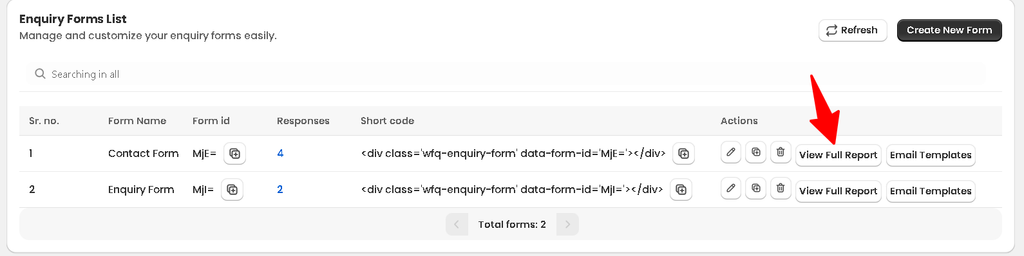
Once customers start submitting your forms, you can review the enquiries through the Quotes Guru app.
Open the Enquiry Forms section and locate the relevant form. Use the available response or submission details to review the information collected from customers.
Frequently Asked Questions #
#
Yes. Quotes Guru supports one enquiry form on the Pro plan and unlimited enquiry forms on the Premium plan. The Free and Basic plans do not include the Enquiry Forms module.
#
Yes. You can create separate forms for purposes such as wholesale enquiries, product questions, contact requests, and custom orders.
#
Yes. You can use the available Shopify Theme Editor app block or the provided shortcode/Liquid integration method, depending on your theme and placement requirements.
#
Yes. You can configure email templates for individual forms, allowing you to customize notifications for your team and confirmation messages for customers.
#
Yes. You can configure enquiry form content for supported storefront languages using the available language and translation settings.


