The Multiple Forms feature in the Quotes Guru app enables merchants to create and assign different quote request forms to products based on specific requirements. This feature is available starting from the Pro Plan and is ideal for stores that need to collect unique data for different types of products.
Custom Forms: Starting from Pro Plan
Free Plan Limitation: Only one global form can be created.
Types of Forms #
1. Global Form #
- A default form is used across all products that do not have a Custom Form assigned.
- Available on both Free and Paid plans.
2. Custom Forms #
- Custom-designed forms for collecting specific data from the customer.
- Created to handle special product requirements.
- Can be assigned to:
- All Products
- Specific Products
- Conditional Products (e.g., using product tags or collections)
- Customer based conditions
- All Products
How to Use Multiple Forms in Quote Guru #
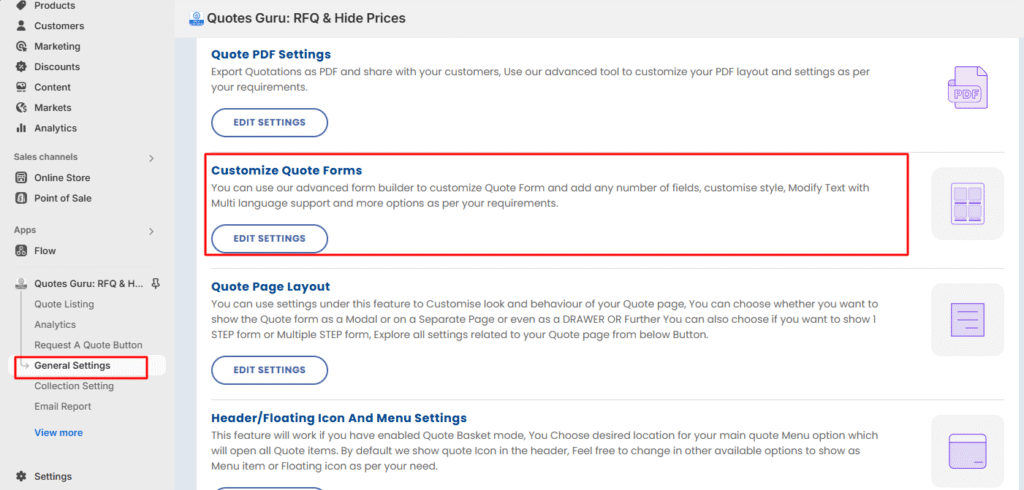
- Go to General Settings
- Find the Customize Quote Form
- Click on the Edit Settings
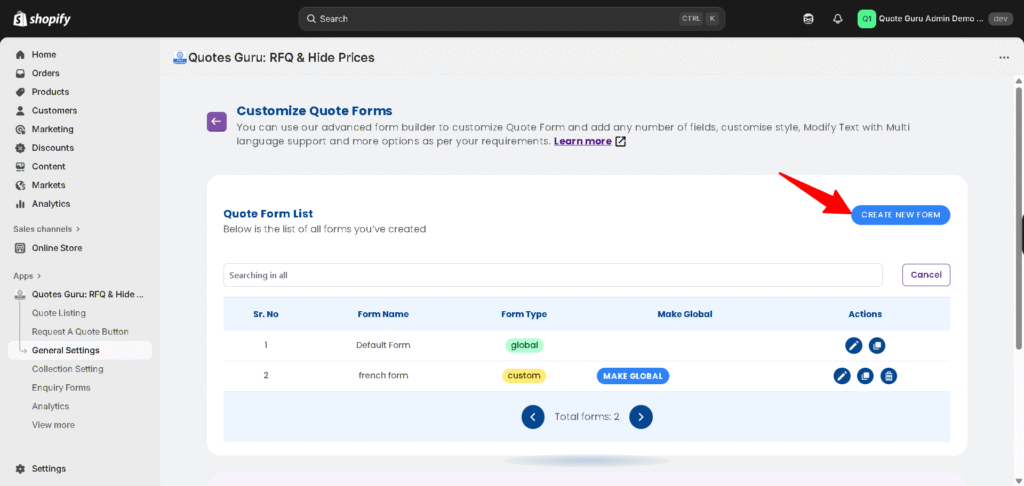
Step 2: Create a Custom Form #
- Click on “Create New Form”.
- Add your custom fields, instructions, or disclaimers.
Step 3: Assign Products #
Under the “Additional Settings” tab:
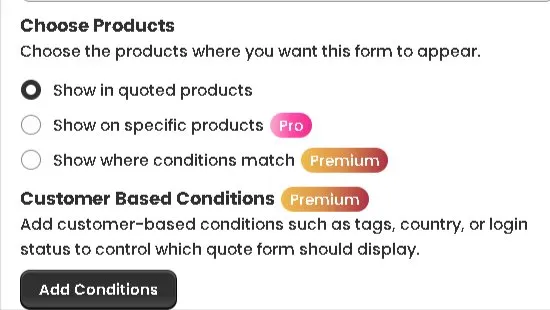
- Choose the assignment method:
- Show in quoted products — The form will appear on all products that are already part of your quote list. This is the default option and works best for most stores.
- Show on specific products(Pro) — Manually select individual products where you want the quote form to appear, giving you more precise control over the customer experience.
- Show where conditions match(Premium) — Display the form based on rule-based conditions, letting you target products dynamically by attributes like product type, tag, vendor, or price.
- Customer Based Conditions (Premium) — You can go a step further and control which customers see the quote form — filtering by customer tags, country, or login status. This is ideal for B2B stores that need different quote experiences for different customer groups.
- Show in quoted products — The form will appear on all products that are already part of your quote list. This is the default option and works best for most stores.
- Save the form.
Step 4: Ensure Quick Quote is Enabled #
Make sure the Quick Quote button is enabled on your store, as Multiple Forms do not work with the Quote List button.
Step 5: Save & Test #
- Preview and test your form on the assigned product
How Can Adding Multiple Email Recipients in the Quote Form #
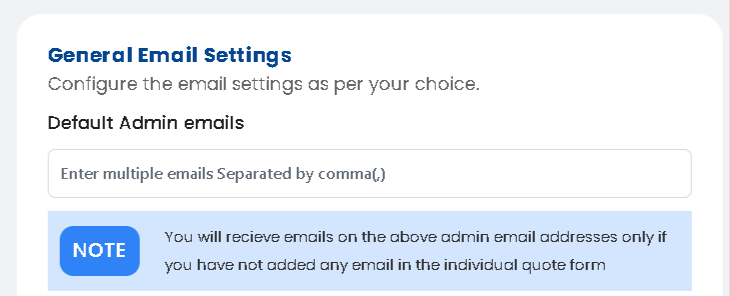
1. General Settings (Available in All Plans) #
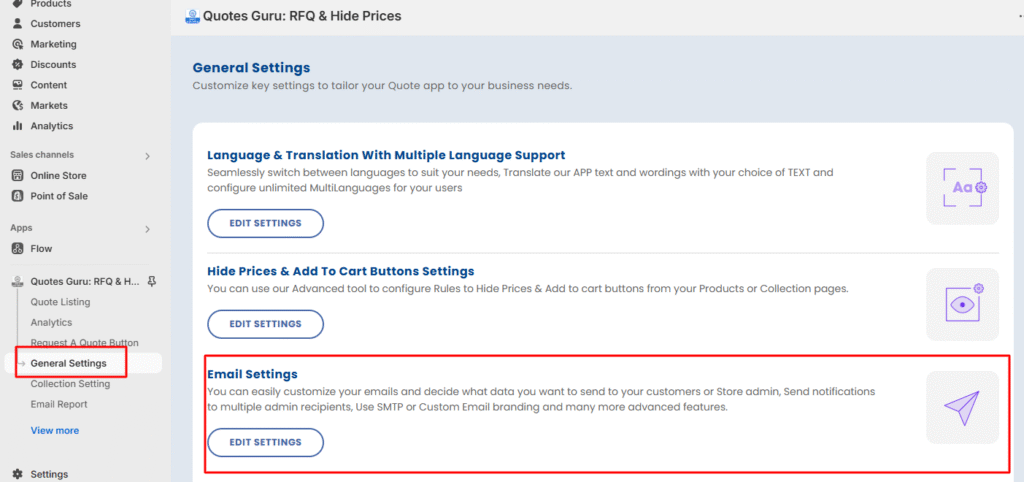
- Navigate to:
General Settings > Email Settings - Add one or more email addresses to receive quote submissions globally.
2. Custom Form Settings (Available in PRO Plan and Above) #
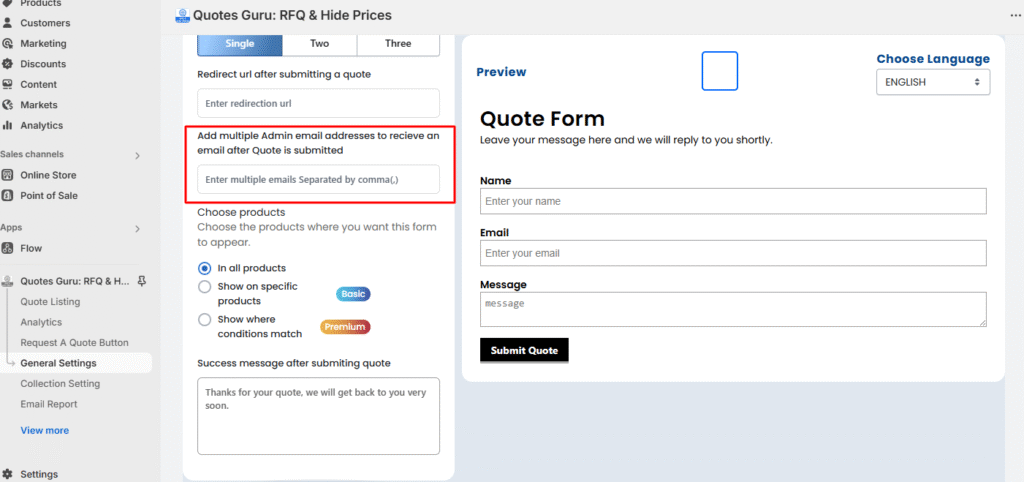
- While editing or creating a custom form, you can add specific recipient emails directly to the form.
- This allows product-specific notifications to different team members.
Email Priority Logic #
The order of priority for sending quote submission emails is:
- Emails added in the Custom Form (PRO plan only)
- If not set, it will use emails from General Settings > Email Settings
- If no emails are entered in either location, the system will send the quote to a default admin email found in the database.
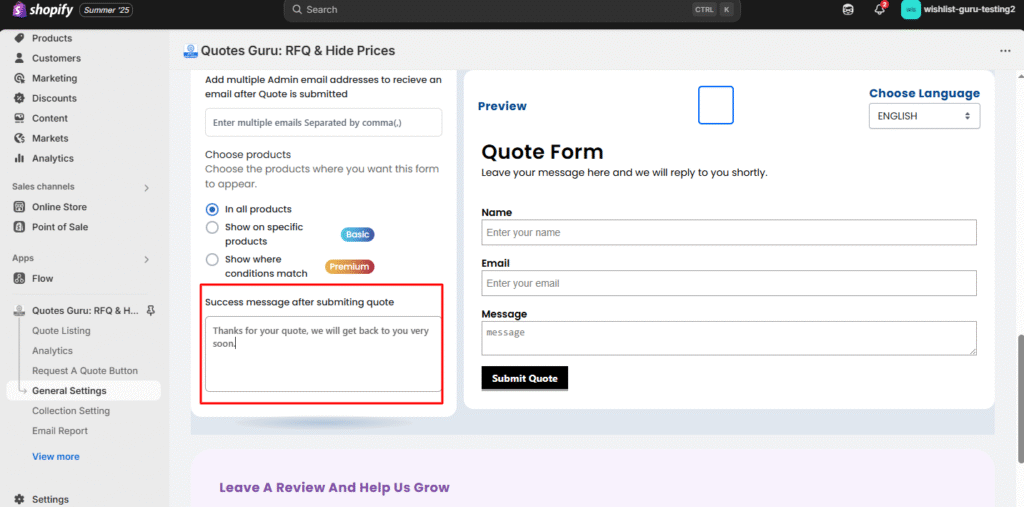
After the creation of multiple forms, the admin can customise the thank you message after the customer sends the quote, as seen in the screenshot below :