
Once you’ve sent a quote to a customer, the last thing you want is for them to have to log back into your store, find their quote, and then figure out how to pay. Every extra step is a chance for them to drop off.
With Quotes Guru, you can add an Approve or Pay Now button directly inside the quote email — so the customer can review the quote and take action with a single click, right from their inbox.
This guide explains how the button works, which button appears based on your settings, and how to enable it.
Note: The Payment button feature is available on the Premium Plan only.
How the Button Works #
The button that appears in your quote email depends on two settings working together:
- Auto Convert to Draft Order — Whether quotes are automatically converted to draft orders on submission
- Show Payment/Approve Button in Email — Whether the button is enabled in your email template
Here’s exactly what your customer will see based on your configuration:
| Auto Convert to Draft Order | Payment Button Enabled | Button Shown in Email |
|---|---|---|
| ✅ Enabled | ✅ Enabled | Pay Now button — takes customer directly to Shopify checkout |
| ❌ Disabled | ✅ Enabled | Approve & Pay Now button — customer approves the quote and proceeds to payment |
| Any setting | ❌ Disabled | No button shown in the email |
What Each Button Does #
Pay Now Button: When auto-conversion is enabled, the quote is already a draft order by the time the customer receives the email. The Pay Now button takes them directly to the Shopify checkout page — pre-filled with all their quote details. One click and they’re ready to pay.
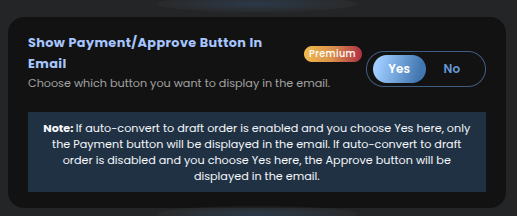
Approve & Pay Now Button: When auto-conversion is disabled, the quote hasn’t been converted to a draft order yet. The Approve & Pay Now button lets the customer signal their approval first — triggering the draft order creation — and then takes them to checkout. This gives you a chance to review and adjust the quote before it becomes an order.
No Button: If the payment button option is disabled in your email settings, no button appears in the email at all. The customer would need to log into your store or contact you directly to proceed.
How to Enable the Payment Button #
For the Customer Auto-Responder Email: #
This is the email sent automatically when a customer submits a quote.
- Go to Quotes Guru: RFQ & Hide Prices in your Shopify admin
- Click General Settings in the left sidebar
- Click Email Settings
- Find the Customer Auto Responder template and click Edit Template
- Scroll down to find “Show Payment/Approve Button in Email”
- Toggle it to Yes
- Click Save
For the Customer Resend Quote Email: #
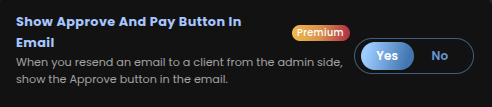
This is the email sent when you edit a quote and resend it from the admin panel.
- Follow the same steps above but open the Customer Resend Quote template instead
- Enable “Show Payment/Approve Button in Email”
- Click Save
Note: The button setting needs to be enabled separately for each email template. Enabling it on the Auto-Responder does not automatically enable it on the Resend Quote email.
Tips for Best Results #
- Use with auto-conversion for the fastest checkout experience — When both auto-conversion and the payment button are enabled, the customer goes from email to checkout in one click — no friction at all
- Use Approve & Pay if you need to review quotes first — Keep auto-conversion off if you want to check every quote before it becomes an order. The Approve button still gives customers a smooth experience while giving you control
- Enable the button on both templates — Make sure the payment button is enabled on both the Auto-Responder and the Resend Quote templates so customers always have a clear path to checkout regardless of which email they receive
- Test before going live — Send yourself a test quote and check that the correct button appears in the email based on your settings
Related Articles:
👉 How to Automate the Full Quote-to-Payment Process in Quotes Guru
👉 How to Automatically Convert a Quote to a Draft Order in Quotes Guru


