This article explains how to create a quote using the Quotes Guru app. You’ll learn how to add products, configure pricing, set customer details, and manage quote options step by step, helping you create accurate and professional quotes quickly and efficiently.
Steps: Go to Quote Listing>Create Quote
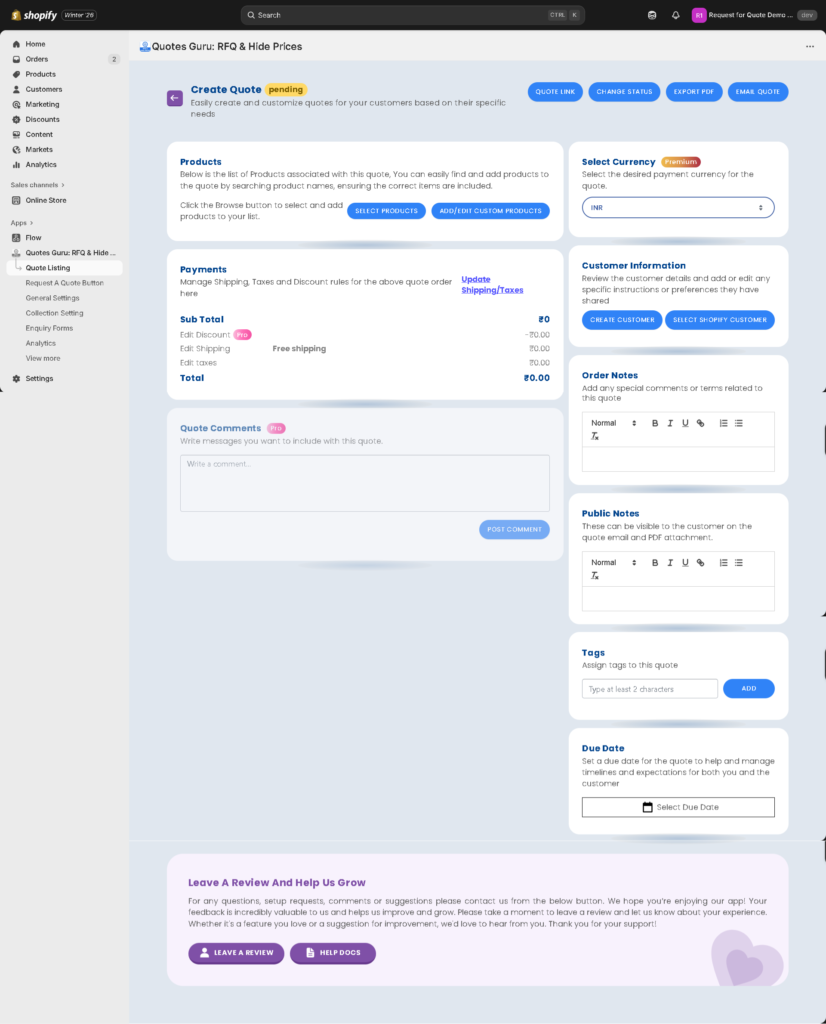
1. Create Quote Overview #
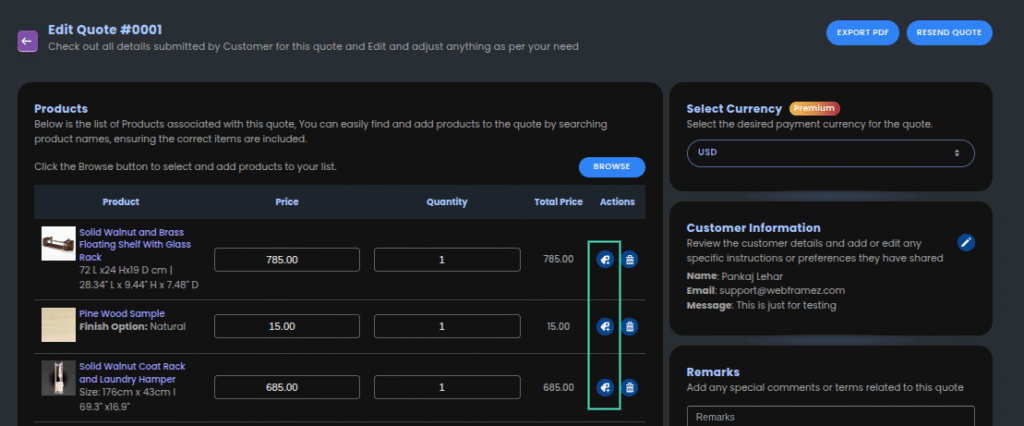
The main quote creation panel allows you to build and tailor quotes based on customer-specific requirements. Each component—products, pricing, customer details, notes, and timelines—can be modified from this centralized workspace.
2. Products Section #
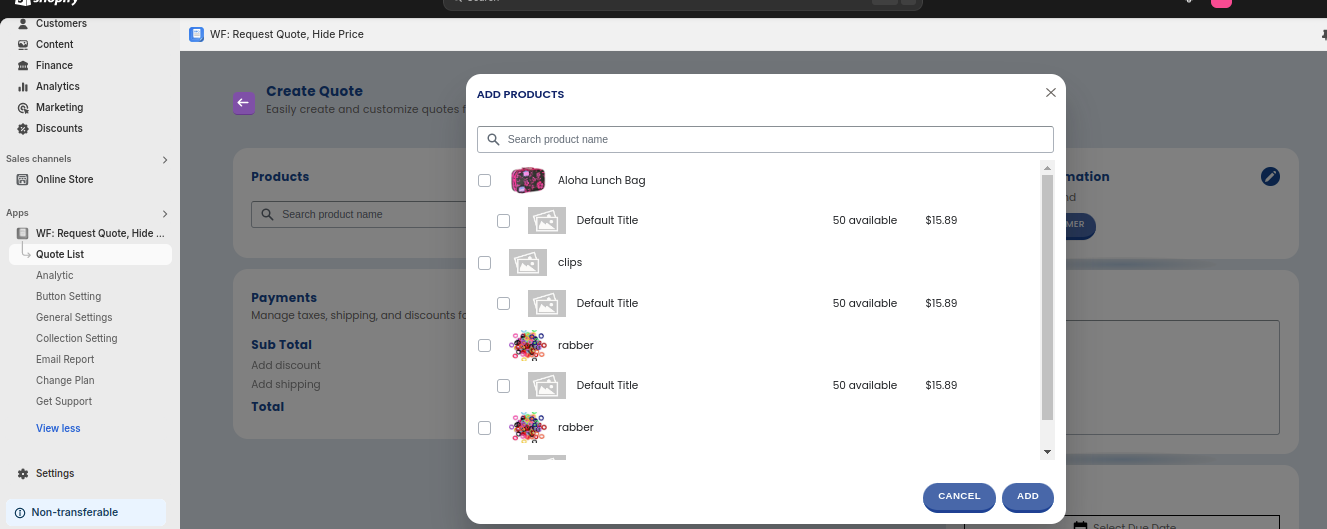
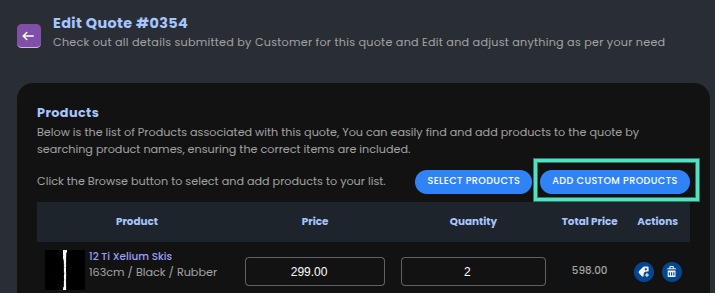
This section displays all products associated with the quote. You can add or edit products using the following options:
- Select Products: Browse your store catalog and add relevant items to the quote.
- Add/Edit Custom Products: Create custom line items for products not listed in your catalog or requiring special customization.
Ensure all product selections are accurate to maintain precise pricing and availability.
3. Select Currency (Premium Feature) #
Choose the appropriate currency for the quote based on your customer’s location or business preference.
This setting ensures that all line items, pricing rules, and totals reflect the selected currency format.
4. Payments and Pricing #
The Payments section enables you to configure:
- Shipping charges
- Taxes
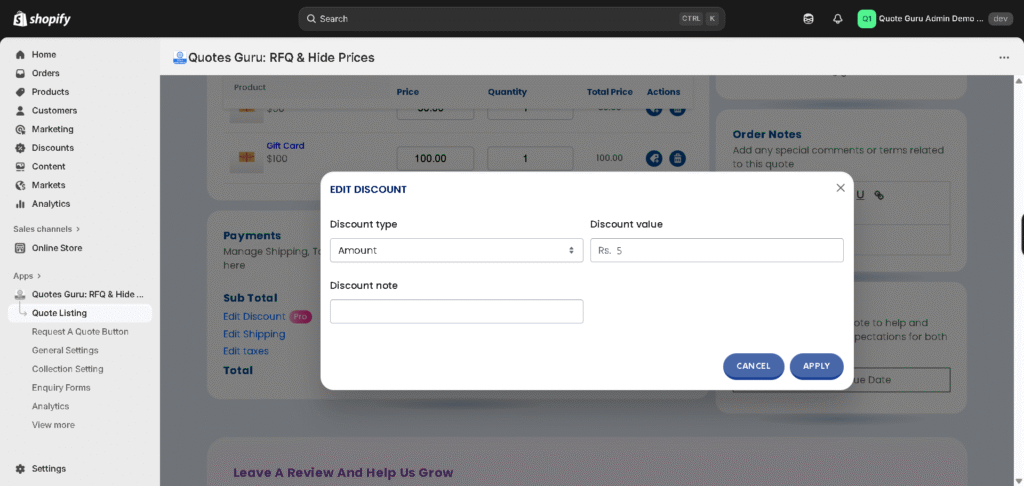
- Discounts (Pro Feature)
Use the Update Shipping/Taxes link to apply the correct rules to the quote.
The Sub Total and Total fields update automatically based on your selections, providing a clear breakdown of all applied charges.
Apply Shipping Rate to Quote: Learn here #
Quotes Guru gives you flexible shipping options when creating quotes, allowing you to apply no shipping, custom shipping charges, or Shopify’s automatic shipping rates. This helps you control costs, match real shipping scenarios, and avoid surprises for your customers.

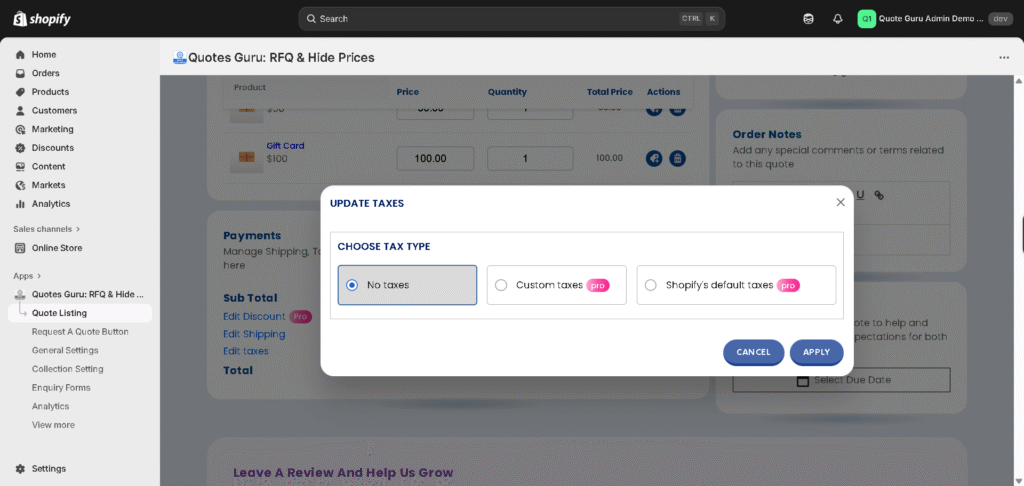
Apply Tax to quote: learn here #
The Manage Taxes in Quotes feature lets you control how taxes are applied to individual quotes. You can apply store tax settings, adjust tax amounts, or exclude taxes based on your business needs, ensuring accurate pricing and compliance before a quote is sent to the customer.
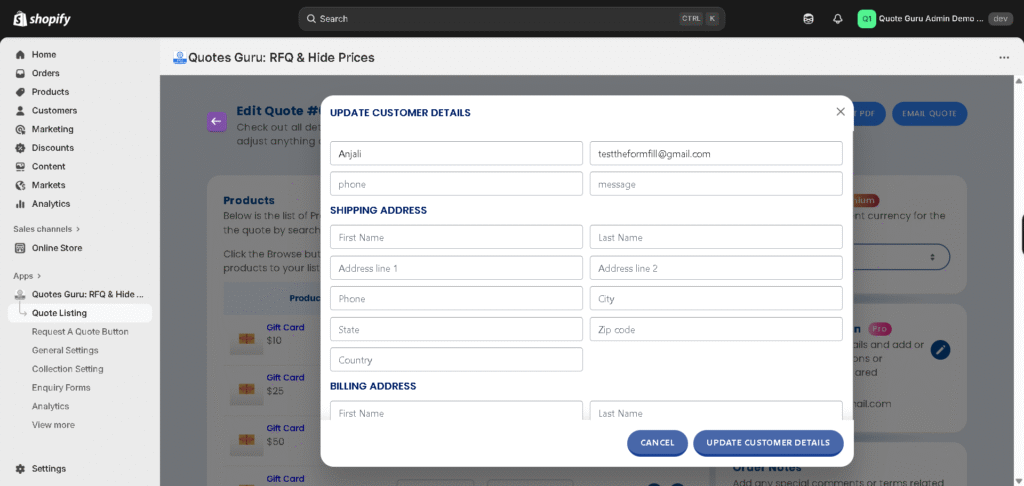
5. Customer Information #
Assign or create customer profiles directly from this panel:
- Select Shopify Customer: Choose an existing customer from your Shopify database.
- Create Customer: Add a new customer profile when needed.
Capturing accurate customer information ensures proper communication and reduces follow-up queries.
6. Order Notes #
This field allows you to record additional instructions, customer preferences, or internal notes related to the quote.
Use the rich-text editor to format your notes as required.
7. Due Date #
Define a due date for the quote to clarify timelines, manage expectations, and maintain a structured follow-up process.
Select the appropriate date using the due-date calendar tool.
8. Public Note #
These can be visible to the customer on the quote email and PDF attachment.
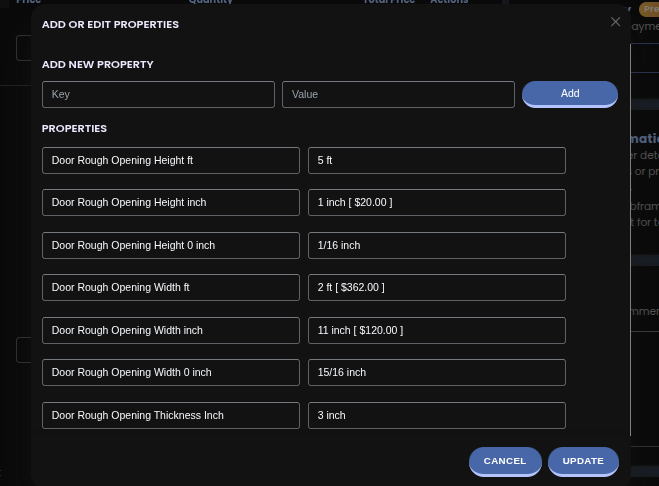
9. Add or edit properties #
Use this section to create custom properties for any product included in the quote. These fields enable you to capture additional product details—such as specifications, customisation notes, or special requirements—ensuring the quote accurately reflects all relevant information.
10. Add Custom Products to Quotes: learn here #
Sometimes, merchants need to add products or services that aren’t part of their Shopify product list (e.g., special bundles, service charges, or custom offerings). With this feature, you can now add those items quickly without having to create a new product in Shopify.
11. Quick Link #
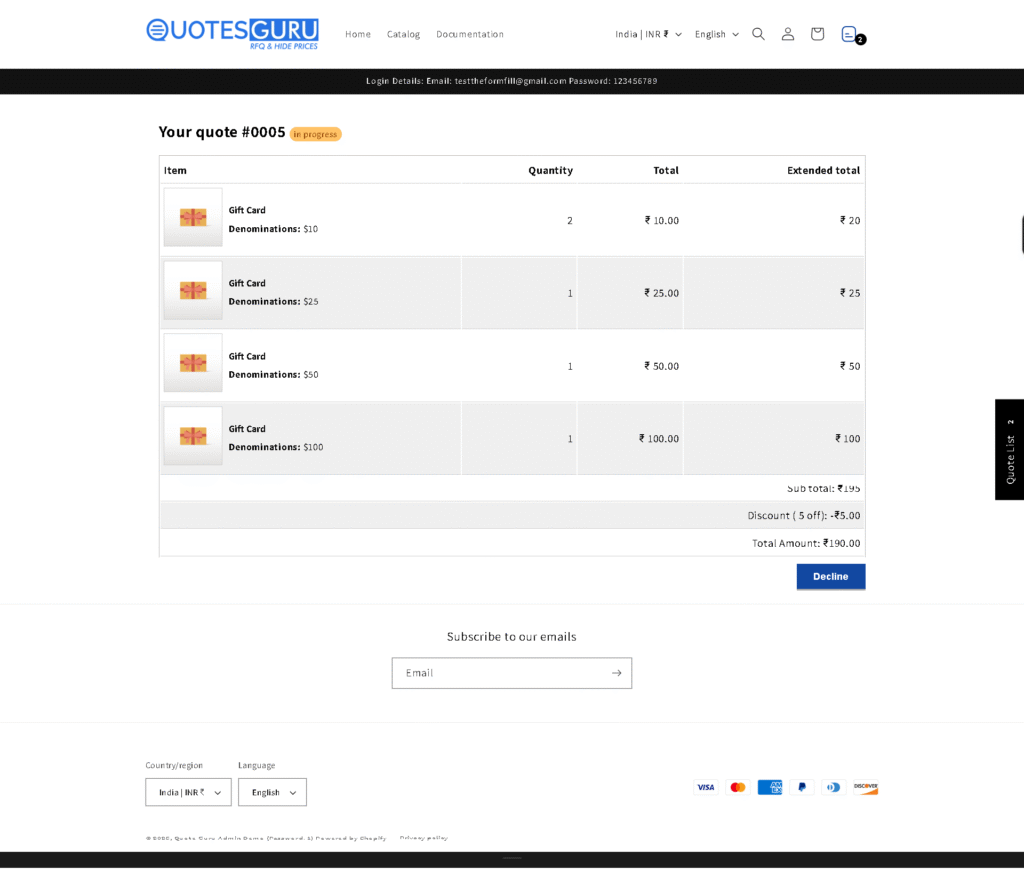
Marchent sent the quick link to the Customer so they can directly see all their quote by this quick quote link.

12. Email Quote #
The Resend Quote Email feature lets you send an updated quote to your customer at any time—without creating a new quote. You can adjust the email content, attach a PDF, change the recipient email, and choose the language before resending. This is useful when prices, products, or terms change after the initial quote is sent.
👉 Read the full guide to learn how to resend quote emails step by step.

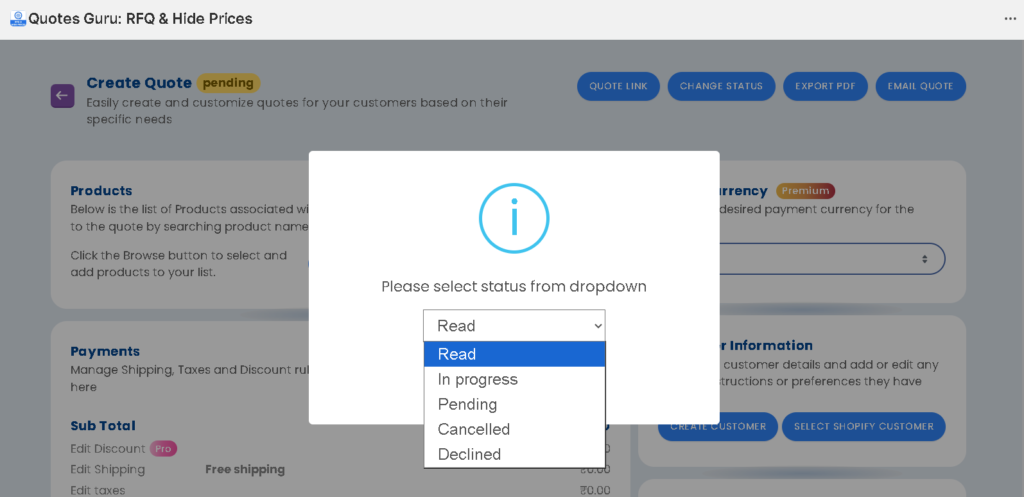
13. Change Status #
The Change Quote Status feature allows merchants to easily manage and track the lifecycle of a quote directly from the quote details page. This helps keep internal workflows organized and ensures the sales team always knows the current state of each quote.
Merchants can update the status of a quote at any time, except for quotes that have already been converted into a Draft Order or where an Order has been placed. All other quotes remain fully editable from a status perspective
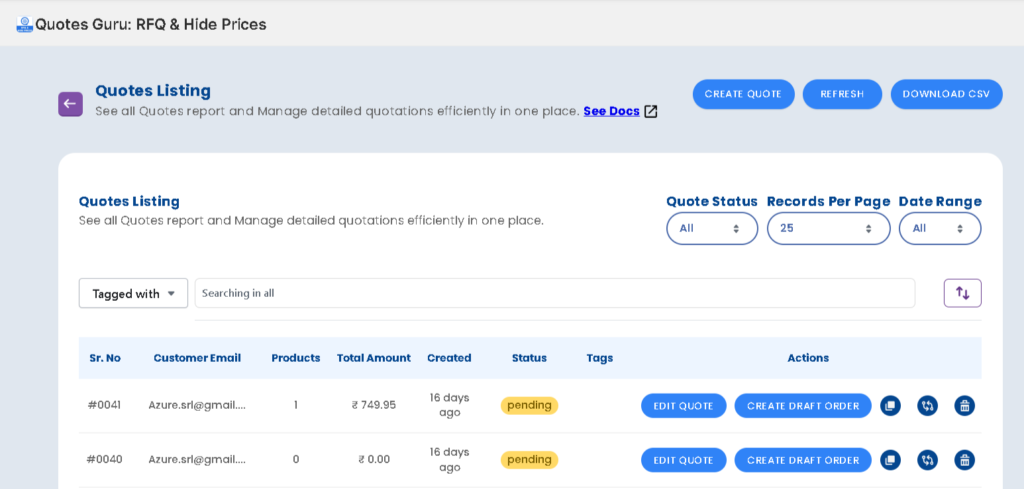
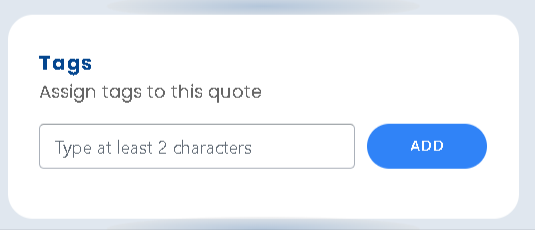
14. Tags #
The Tags feature allows merchants to label and organise quotes for better tracking, filtering, and follow-up management.
Filter Quotes by Tags #
Merchants can filter quotes using tags to segment and organize quotes more effectively.
You can:
- Select one or multiple tags
- Combine tags to narrow down results
- Clear individual tags or reset all filters instantly
This is especially useful for categorizing quotes by priority, sales stage, or internal workflows.

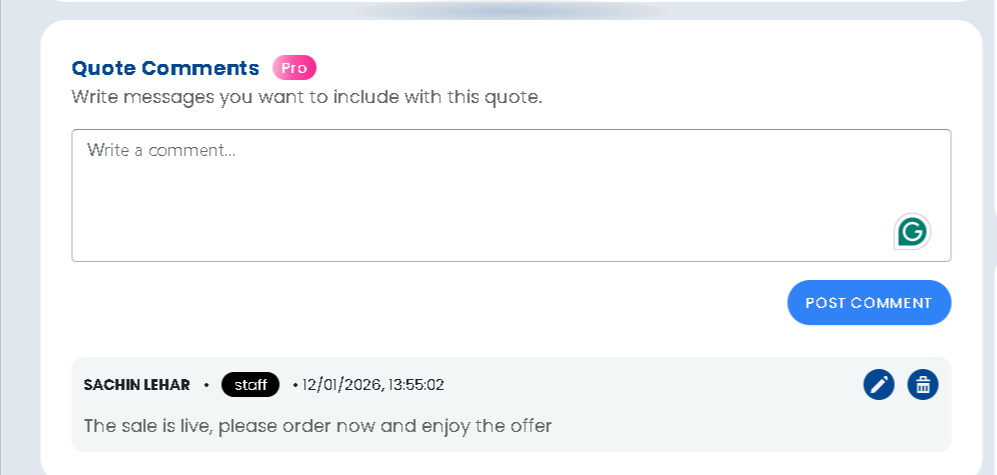
15. Quote Comments #
Quote Comments allow you to add notes directly to a quote for better communication and tracking. You can use comments to share additional details with customers or leave internal notes for your team. This helps keep all quote-related discussions organized in one place.
👉 Learn more about how to use Quote Comments effectively in our detailed guide.